
Custom Embroidered Patches offer a creative way to personalize clothing and gear, blending art with durability. For makers, DIY embroidered patches turn simple fabric into standout identifiers that endure through wash and wear. If you’re curious about the process, this guide shares design decisions, materials, and stitching options to help you craft crisp, vibrant patches for a professional finish that lasts wash after wash. A strong patch design begins with a clear concept and a limited color palette, ensuring legibility from a distance. Finish with thoughtful backing and edge options to suit different garments and occasions, finishing with lasting consistency.
Beyond the exact term, industry chatter often calls these fabric emblems, garment badges, or decorative appliques that decorate jackets, bags, and uniforms. These interchangeable terms reflect the same craft—design, digitizing, backing, and finishing—so you can approach a project with flexible vocabulary. By thinking in related concepts such as emblems, badges, and fabric adornments, you can explore different sizes, fabrics, and edge finishes while staying true to the design goal.
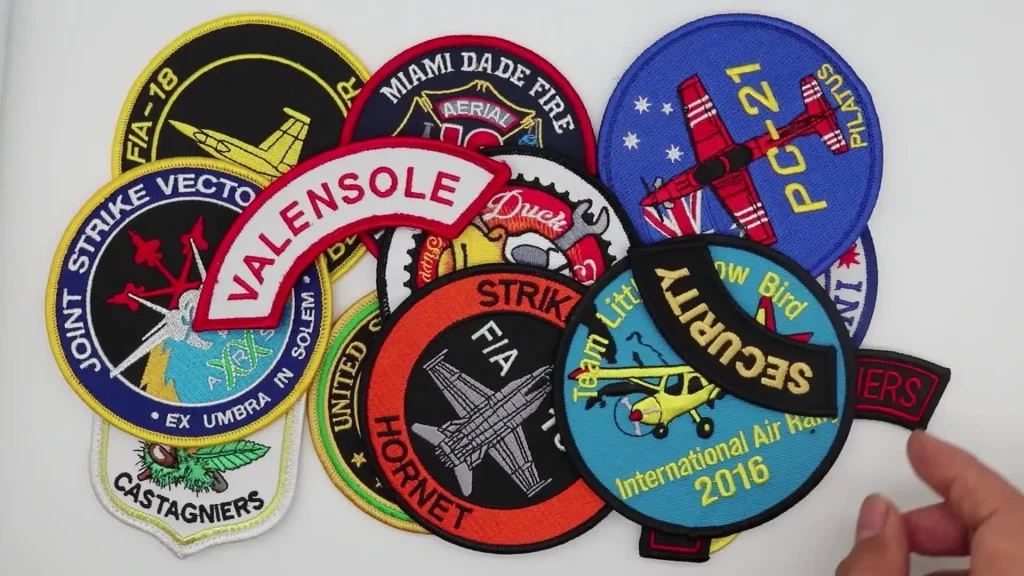
Concept and Design for Custom Embroidered Patches: From Idea to Patch
A great patch starts with a clear concept that communicates identity, purpose, and location of use. Consider whether the patch will adorn hats, jackets, bags, or uniforms, and tailor the size and line weight to maintain legibility across fabrics. This is where DIY embroidered patches begin to take shape, aligning the message with bold shapes and a restrained color palette so embroidery remains crisp on common fabrics.
Translating that concept into a patch involves a practical design process. Focus on clean edges, legible lettering, and sufficient negative space so stitches define the image from a distance. For beginners and experienced makers alike, starting with scalable vector art lets you resize without distortion and test how elements interact before committing threads. In short, a strong custom patch design is both visually striking and technically stitch-friendly.
Tools, Materials, and Backings for DIY Embroidered Patches and Sew-On Options
Set up a practical starter kit for DIY embroidered patches that covers the essentials: an embroidery machine (or hand embroidery for non‑machine patches), stabilizers, patch backings (iron-on, sew-on, or non-adhesive), embroidery threads, and a cutting tool. A solid stock of denim, twill, or cotton twill fabrics works well, and keeping a thread swatch book helps match colors across patches—crucial for consistent custom patch design.
Backing choices influence durability and wear, especially for sew-on patches and clip-ready badges. Iron-on backings are convenient for quick attachment, but sew-on backings often outlast washing cycles. If you plan clip-ready designs, select a backing and stabilizer that support the hardware you’ll use—clips, grommets, or magnetic backs—without adding excessive thickness.
Digitizing and Stitch Planning: Turning Art into Embroidery
Digitizing is the bridge between your artwork and stitch execution. Convert your design to a stitch file the machine reads, mapping stitch types, densities, underlay, and color stops. Start with clean vector lines, convert text to outlines, and choose stitch types—satin for outlines, tatami or fill for large areas, and subtle running stitches for detail. For DIYers, practicing on scrap fabric with the same stabilizer helps you test density and edge quality before producing the final patch.
If you don’t have in-house digitizing, you can collaborate with a local embroidery shop or hire a digitizing service. They’ll supply the stitch file and a stitch count estimate, helping you balance cost and quality. Whether you’re learning how to make embroidered patches or refining a custom patch design, testing the plan early reduces surprises in production.
Production Techniques: Stitching, Edges, and Finishing
With a digitized file ready, begin production by hooping and stabilizing the fabric to prevent shifting and distortion. Run a test stitch to verify alignment, color accuracy, and density, then proceed with the full stitch sequence. Maintaining clean edges and precise color stops is essential for a professional look in DIY embroidered patches and for clip-ready badges, where hardware sits near the border.
Edge finishing and backing impact wear resistance and appearance. A merrowed edge is a common, durable choice, while laser-cut or heat-cut edges offer a flatter, softer finish. When making clip-ready designs, ensure the edge near the hardware remains robust and that small features near the edge aren’t over-stitched. These decisions influence how well the patch wears and how cleanly it clips onto items.
Clip-Ready Badges: Designing Patches for Quick Attachment
Clip-ready badges are designed to attach quickly to hats, bags, and uniforms without compromising stitch integrity. Keep the patch thickness manageable to avoid misalignment with clip hardware and choose a backing that supports clipping. A denser stabilizer under the embroidery helps the patch resist curling and maintains a flat surface where the clip sits.
When marketing or testing clip-ready designs, highlight ease of use and compatibility with common hardware. Ensure edge finishing remains durable near the clip area, and test on representative items to confirm that clipping doesn’t distort the design. This practical approach highlights the patch’s functionality and broadens its appeal to clubs, teams, and brands seeking ready-to-wear patches.
Quality Control and Growth: From Hobby Patches to a Business
Quality control is essential for patches you plan to sell or distribute. Check stitch density to avoid puckering, verify color accuracy and colorfastness on the chosen fabric and backing, and ensure edge finishing is uniform. A consistent backer and stabilizer setup helps maintain uniform results across DIY embroidered patches and professional runs alike.
As you scale, build a strong portfolio that demonstrates your custom patch design skills, including a variety of sizes, backings, and edging. Document your process, from concept to clip-ready or sew-on patches, so you can reproduce successful patches reliably. With attention to detail and repeatable workflows, you can turn ideas into tangible, durable patches for hats, jackets, bags, and more.
Frequently Asked Questions
What are Custom Embroidered Patches and how do you start from concept to creation
Custom Embroidered Patches are fabric emblems created with embroidery that can be applied to clothing and gear. Start with a concept by defining the message, intended use, size, and color palette; simplify complex imagery into bold shapes; design at the target size or use scalable vector art and test on similar fabric before stitching.
How do you create a strong Custom Embroidered Patches design for sew on patches and clip-ready badges
A strong patch uses bold shapes, limited colors, clear lettering, and adequate negative space so stitches read well. Translate the concept into a simple custom patch design suitable for embroidery and test edges and readability at the target size. If needed, digitize to test.
What tools and materials do I need for DIY embroidered patches
For DIY embroidered patches gather an embroidery machine or hand embroidery setup, stabilizer, patch backing (sew-on or iron-on), embroidery threads, compatible fabric, scissors, and optional positioning spray.
What is digitizing for how to make embroidered patches and should I digitize myself or hire a service for Custom Embroidered Patches
Digitizing is the process of converting artwork into a stitch file with stitch types, densities, and color stops used to produce the patch. You can test a simple design yourself or hire a local embroidery shop or a digitizing service for a professional file and estimated stitch count.
What backing options work best for sew-on patches and clip-ready badges
Sew-on patches benefit from a stable backing and clean edge finishes. Clip-ready badges require a thicker stabilizer and a backing designed to support hardware without distortion. Iron-on backings offer quick attachment but may be less durable after washing; choose based on use.
How can I ensure quality control for Custom Embroidered Patches
Check stitch density and pull, verify color accuracy and colorfastness on the same fabric, ensure clean edge finishing, test backing adhesion, and confirm size accuracy with prototype patches before larger runs.
| Key Point | Summary |
|---|---|
| Concept and Design | Start with a clear concept: message/identity, intended use, and a color palette. Translate into an embroidery-friendly design by simplifying imagery into bold shapes with limited colors. Ensure clean edges, sufficient negative space, and test sizing; sketch ideas before digitizing. |
| Tools and Materials | DIY vs. professional routes; starter kit items include: embroidery machine, stabilizer, patch backing, embroidery threads, suitable fabric, trimming tools, and optional positioning adhesive. For clip-ready patches, choose backings and hardware (clip, grommets, magnetic backs) accordingly. |
| Digitizing and Stitch Planning | Convert the design into a stitch file, using vector artwork as a source. Choose stitch types (satin for outlines, fill for large areas), limit color changes, and test on scrap fabric. If software or expertise is unavailable, work with a local shop or digitizing service. |
| Production | Hoop and stabilize the fabric, run a test stitch, then stitch the final design with planned color stops. Trim the patch and apply backing. Edge finishing commonly uses a merrowed edge; alternatives include laser-cut or heat-cut edges depending on desired look and wear. |
| Clip-ready Badges | Design patches to accommodate clip hardware and keep thickness manageable. Use stable backing to resist curling, choose edge finishes that won’t crack at clips, and consider features near the edge to avoid under-stitched areas. Highlight clip-ready benefits in product visuals. |
| Quality Control | Check stitch density and pull compensation, color accuracy and colorfastness, edge clean-up, backing adhesion, and size consistency. Address issues like fabric fraying, thread snagging, or curling with adjustments to stabilizer, density, or edge finishing. Run small test batches for consistency. |
| Design Inspiration & Use Cases | Versatile across sports teams/clubs, corporate branding, fashion/streetwear, events, and DIY projects. Offer multiple sizes and backings; provide previews or mock-ups to help buyers visualize the final patch. |
| Hands-on Tips | Start with simpler designs to build skill; use high-contrast colors for legibility; digitize with a conservative stitch count and add detail in later passes; maintain a thread swatch book and document your process for reproducibility. |
| Applications & Selling Ideas | Identify a niche (local clubs, schools, teams, small brands, cosplay) and build a portfolio showing design options, sizes, and backings. Emphasize durability and ease of sewing or clipping, and nurture relationships for steady orders or tap into online channels for broader reach. |
Summary
Conclusion: Custom Embroidered Patches offer a versatile craft and business opportunity, turning ideas into durable, wearable badges. From concept and design through digitizing, production, and edge finishing, the process is repeatable and scalable. Whether pursuing DIY embroidered patches for personal projects or building a patch-making business, focusing on thoughtful design, appropriate backing, and reliable stitching will yield patches that wear well on hats, jackets, bags, and uniforms. Start with a simple concept, test prototypes, and gradually expand with different sizes, backings, and finishes to meet a variety of customer needs.