
Custom banner sizes and placement shape every successful marketing effort by ensuring the right balance of visibility, clarity, and branding, so your message lands with the impact you expect across diverse venues, from crowded trade shows to quiet lobby areas, while accounting for ceiling height, sightlines, and audience flow. Choosing the right dimensions affects readability from distance, print quality, and the likelihood your audience will engage with the message, whether viewed in person at a trade show or on a storefront window. This introductory guide highlights practical approaches to optimizing size, placement, and design for maximum impact, drawing on real-world examples and proven techniques used by brands that routinely win attention. By considering viewing distance, environmental lighting, and audience flow, you can craft banners that perform at events, in stores, and in busy public spaces, without compromising branding or legibility. A few reliable references can help ensure consistent production and clear communication while you experiment with layouts, typography, and color to suit multiple contexts, as outlined in banner size guidelines.
In other words, you can discuss the same idea using different terms tied to layout, signage, and visual hierarchy, a strategy that mirrors how people interpret information as they move through a space or scroll a page. Similarly, signage language, display sizing, and placement strategy can be used interchangeably to describe how a design occupies space and guides attention, helping teams communicate more effectively. LSI-friendly language also covers banner dimensions, signage height, color contrast, typography weight, and spacing, so content creators can map reader intent to content without repetitive terminology. By weaving these alternatives into your planning language, you help search engines and readers connect the concept to practical settings such as conventions, pop-up shops, or storefronts, reinforcing how size and placement influence behavior. Ultimately, the core aim remains the same: maximize readability and impact through thoughtfully positioned visuals, tested across environments and refined through feedback from organizers, designers, and attendees. In practice, this broader vocabulary supports clearer briefs, more consistent signage across events, and faster decision-making when time or space is limited. The goal is to ensure passersby notice, understand, and act on your message as they move through real-world spaces. By maintaining this flexible, keyword-aware approach, you can craft copy and visuals that perform consistently across channels, boosting recall and driving action, no matter the venue or medium.
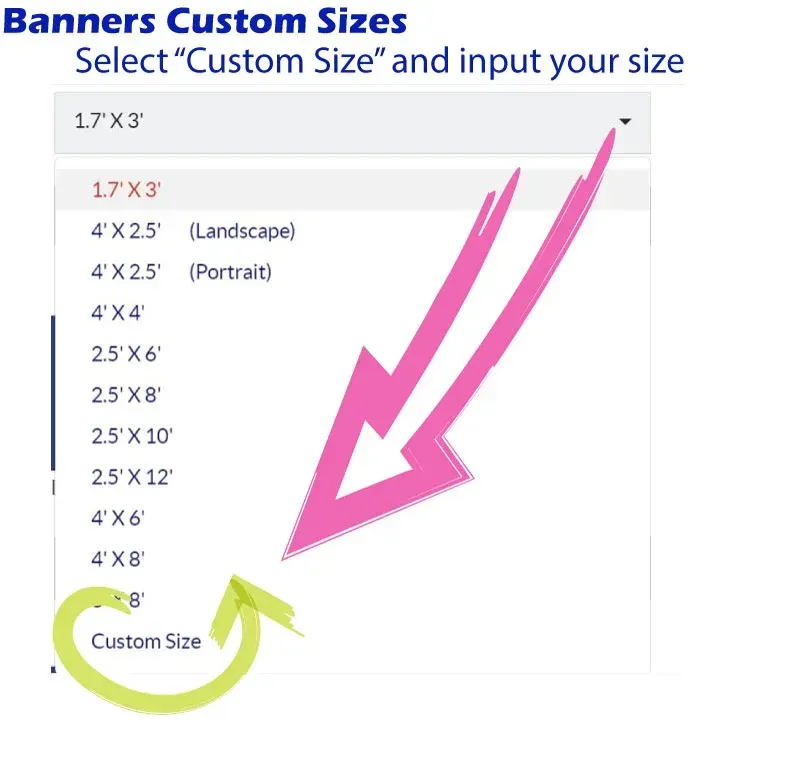
Understanding banner size guidelines for effective displays
Size determines how far away a banner can be read and how much information it can convey without overwhelming the viewer. By following banner size guidelines, you ensure your message remains legible from the intended viewing distance while still reflecting your branding. Proper sizing supports quick scanning, strong visual impact, and a clear hierarchy that guides attention to the core offer.
When selecting a banner size, consider the display environment, audience distance, and the amount of information that can be presented without clutter. Larger banners are typically better for high-traffic areas where viewers may be several meters away, while smaller formats suit intimate spaces. The goal is to balance readability with aesthetic cohesion so the banner feels professional and credible.
Roll up banner dimensions: balancing portability and impact
Roll up banners are prized for portability and rapid setup. Understanding roll up banner dimensions helps you optimize messaging for a quick read and a strong first impression at booths, entrances, and pop-up stations. A common roll up size such as 33 inches wide by 80 inches tall (84 cm x 203 cm) keeps content at eye level and maximizes legibility without overwhelming the user.
Compact yet impactful, roll up banner dimensions should be chosen based on the venue layout and anticipated viewing distance. When space is constrained, a slimmer width with clear, bold typography can deliver a decisive headline and a concise CTA without sacrificing readability. Always design with scalable imagery so the banner remains sharp when printed at larger sizes.
Banner placement best practices for high-traffic environments
Placement is the second pillar after size in the banner performance equation. The best banners are placed where viewing angles are unobstructed and sightlines are clear, maximizing recall. Eye-level alignment and strategic positioning near entrances or along main pathways ensure your message is encountered early and repeatedly.
Proximity and flow matter: group banners with related cues and route attendees toward a desired action. Consider lighting, contrast, and surrounding signage to avoid glare and clutter. By adhering to banner placement best practices, you improve engagement without adding visual noise to the space.
Custom banner design tips to maximize clarity and conversion
Effective design starts with clarity. Follow custom banner design tips to craft a banner that communicates your value proposition in seconds. Use bold, sans-serif headlines, high-contrast colors, and a clean layout that prioritizes a single focal point—the main message or CTA.
Consistency in typography, color, and logo usage reinforces branding while supporting legibility. Use high-resolution imagery and limit the color palette to 2–3 hues to maintain visual cohesion. A well-executed design balances text and imagery, ensuring your banner reads well from distance and converts viewers into customers.
Event banner sizes: choosing formats for trade shows and conferences
Event banners must stand out in crowded environments where attendees are moving quickly. Event banner sizes are chosen to maximize visibility from a distance, with bold headlines and concise supporting lines that communicate essential details at a glance. Planning around viewing distances and attendee flow helps your banner capture attention where it matters most.
For events, you’ll often use roll up banners at entrances, stage backdrops, and smaller banners near registration desks. Selecting the right event banner sizes involves matching the space, audience pace, and event theme, so your messaging remains legible and impactful even in dynamic settings.
Putting it all together: Custom banner sizes and placement plan
A practical plan for Custom banner sizes and placement begins with assessing your space, audience, and objective. Start by selecting target banner sizes that fit the setting and support readability from the expected viewing distance, then map placement to high-traffic points where attention is highest. Design with clarity, contrast, and branding to keep the banner visually compelling without overwhelming the viewer.
In practice, you might approach a trade show by selecting a roll up banner size (for example, 33×80 inches), placing it near the entrance, and designing a bold headline with a secondary line and a clear CTA. For storefront promotions, choose a larger format that spans across a window while keeping the headline legible from the street. Across contexts, the principles of Custom banner sizes and placement remain consistent, driving better engagement and recall.
Frequently Asked Questions
How do I choose the right Custom banner sizes and placement for a trade show booth while following banner size guidelines and banner placement best practices?
Start by estimating viewing distance and identifying the booth’s focal point, then select a standard roll up size such as 33×80 inches (common in the US) or 85×200 cm (popular in Europe). Place the banner where it’s easily seen—near entrances or along high-traffic sightlines—and keep the main message at or near eye level. Use a clear hierarchy with a bold headline and a concise CTA, and ensure the design aligns with your brand for maximum impact.
What are banner size guidelines for event banners, and how can I apply custom banner design tips to optimize Custom banner sizes and placement?
Event banner sizes should balance readability with visibility from typical crowd perspectives. Start with standard options like roll up banners or larger wall banners, using bold typography and high-contrast colors. Apply custom banner design tips such as limiting to 2–3 colors, using high-resolution imagery, and keeping copy succinct to ensure legibility from distance, all while preserving branding consistency.
Which are the common roll up banner dimensions, and how should I decide which ones to use for different spaces within the Custom banner sizes and placement framework?
Common roll up banner dimensions include 33×80 inches (84×203 cm) for US setups and 85×200 cm in many European contexts. Choose based on viewing distance, space constraints, and desired copy density: larger sizes for long-range viewing and smaller ones for tight booths. Always verify that the chosen dimension fits the space while preserving legibility and a strong focal point.
Where should I place storefront banners for maximum impact, following banner placement best practices and considering Custom banner sizes and placement?
Aim for eye-level placement (roughly 60–70 inches or 150–180 cm from the floor) where passersby naturally look, and ensure clear sightlines free from obstructions. Position banners to guide movement toward a CTA, group related signage to reduce cognitive load, and account for lighting to maintain contrast and readability in storefront environments.
How can I design banners that work across indoor and outdoor settings using banner size guidelines, event banner sizes, and Custom banner design tips?
Design for versatility by selecting scalable layouts and vector logos, using high-resolution imagery, and limiting text to essential messages. Apply a consistent color palette (2–3 colors) and bold typography to ensure readability from varied distances. Match each banner’s design to the chosen size and placement context, whether at events or storefronts, to maintain legibility and brand impact.
What common mistakes should I avoid with Custom banner sizes and placement to maximize readability and engagement?
Avoid overcrowding with too much text or imagery, use low-contrast colors, and rely on tiny type that’s unreadable from a distance. Don’t place banners behind obstacles or in glare-prone spots, and skip inconsistent branding across signs. Always test designs in real-world settings and adjust size, spacing, and placement to improve recall and action.
| Key Point | Description |
|---|---|
| Size and placement drive readability and impact | Banner size must fit the viewing distance and space; correct placement captures attention and improves recall, ensuring the message isn’t lost. |
| Standard sizes and options | Common options include roll-up banners (e.g., 33×80 inches / 84×203 cm; 85×200 cm in some regions), wall banners (2–6 ft widths; 3–6 ft+ heights), counter/table banners, and outdoor banners (e.g., 3×5 ft, 4×8 ft, 6×3 ft). Each size suits different venues and viewing distances. |
| Choosing the right size for a setting | Use quick tests: distance read test, focal point test, and floor-plan proximity to guide size; lean toward larger sizes for high-traffic areas while keeping layout concise. |
| Placement strategies | Place key copy at eye level (roughly 60–70 inches / 150–180 cm), ensure clear sightlines, manage lighting and contrast, use directional flow to guide attention, and position banners near related cues or entrances. |
| Design considerations to support sizing and placement | Prioritize clarity with a strong headline, use bold typography, high-contrast colors, high-resolution imagery, adequate white space, a clear CTA, and brand-consistent visuals. |
| Common mistakes to avoid | Text too distant, pixelated imagery, crowded layouts, inconsistent branding, and failing to test in real-world settings. |
| Event banners and practical planning | For events, banners should read clearly from crowd distance; combine roll-up banners at entrances, backdrop banners on stages, and smaller banners near registration with a strong headline, concise supporting line, and a prominent CTA. |
| Putting it all together | Develop a practical plan by assessing space, audience, and objective; select a target size, map placement to high-traffic points, and design for clarity, contrast, and branding to ensure a compelling, professional result. |