
Iron-On Embroidered Patches have surged in popularity as a quick, mess-free way to refresh clothing and accessories. If you’re asking how to apply iron-on patches, this guide covers simple steps, plus durable patch application tips to ensure a lasting bond. From selecting the best fabrics for iron-on patches to iron-on patch care tips and washing guidance, you’ll maximize longevity. We also cover removing iron-on patches and reapplication to switch up your look. Whether you’re patching denim, jackets, or backpacks, these practical tips deliver durable patch application tips that stay put.
As a fast garment upgrade, these heat-activated fabric appliqués let you personalize jackets, backpacks, and tees without sewing. Also known as adhesive-backed embroidery patches or fabric embellishments, they rely on heat and pressure to form a secure bond. Applied across cotton, denim, and sturdy blends, they offer design flexibility while keeping care simple and predictable. For long-lasting results, focus on prep, correct temperature, and gentle post-application care to preserve color and adhesion.
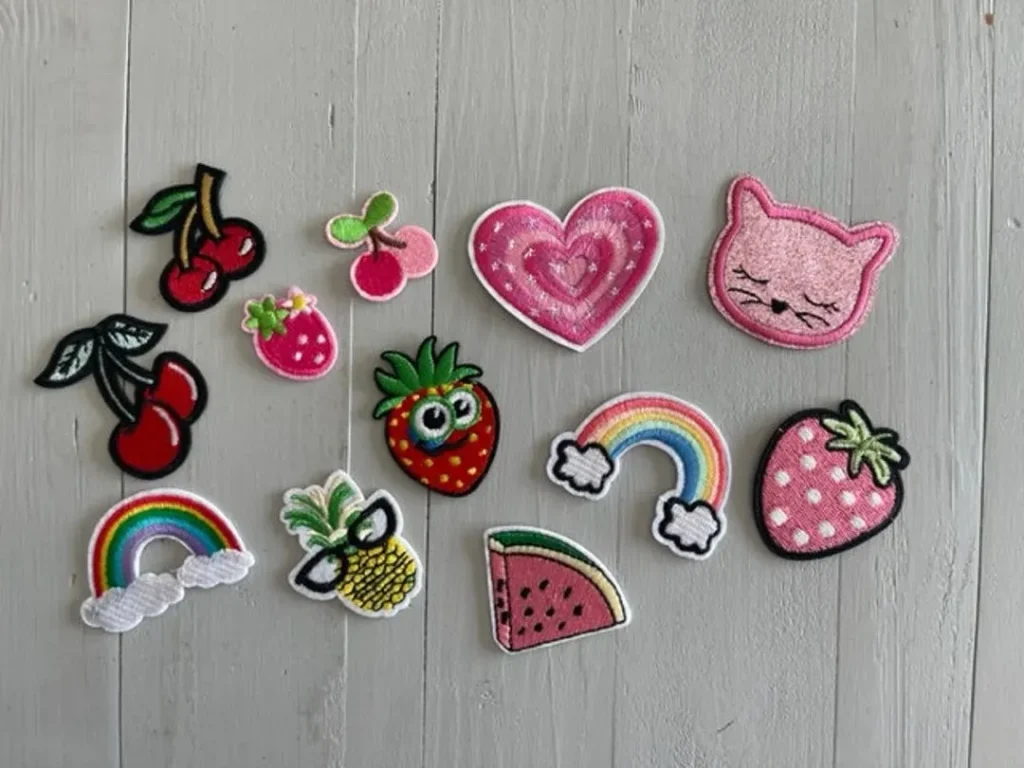
What are Iron-On Embroidered Patches and Why They Work
Iron-On Embroidered Patches are decorative fabric pieces with heat-activated adhesive on the back. The embroidery adds texture and color, creating a polished look that can be applied quickly and without sewing. If you’ve ever wondered how to apply iron-on patches, the mechanism is straightforward: heat activates the glue, fusing the patch to the fabric when pressure is applied.
This convenience is what makes Iron-On Embroidered Patches a popular choice for refreshing clothing and accessories. They bond best to sturdy fabrics, and when applied correctly, the result is a durable finish that withstands everyday wear and washing. For successful applications, it helps to know the best fabrics for iron-on patches such as cotton, denim, and canvas, which respond well to the heat-activated adhesive.
How to Choose the Right Patch for Your Fabric
Choosing the right patch starts with fabric compatibility and the patch’s size and design. Consider the fabric you’re decorating—cotton, denim, and canvas typically provide the strongest adhesion, while delicate knits or silk may require stabilizers or sewing for extra security.
Beyond fabric, think about patch size, shape, and color. Larger patches grab attention, while smaller patches suit sleeves, pockets, or collars. A design that complements the garment color and texture will look more seamless. For durability, also check the backing and embroidery density, as these influence how long the patch will hold up with wear.
Step-by-Step Guide to Apply Iron-On Patches
Here’s a clear guide to applying patches. Start by preparing the fabric—wash and dry to remove sizing, then iron the surface to create a smooth, even bond. Position the patch where you want it and, if applying multiple patches, mark the layout with removable fabric chalk.
Protect the fabric with a thin cotton cloth or parchment paper, set the iron to a high cotton/linen setting with no steam, and press firmly for 20–30 seconds. Check adhesion, re-press any edges that haven’t fully bonded, then allow the patch to cool completely. For added security, you can sew around the edge with a tight zigzag stitch or whip stitch for durability in high-wear areas.
Care Tips to Prolong Patch Life
To keep Iron-On Embroidered Patches looking crisp, follow gentle care routines. Turn the garment inside out before washing to reduce edge abrasion and opt for air drying when possible. If you must use a dryer, choose a low-heat setting and remove promptly to minimize heat exposure.
Avoid harsh chemicals that can weaken the adhesive. Bleach and strong detergents should be kept away from patches, and fabric softeners should not be applied directly on them. After a few washes, inspect patches for lifting and reapply heat with a pressing cloth if needed to reseal edges.
Durability Hacks: Durable Patch Application Tips for High-Wear Areas
Durability can be boosted with a few practical steps. In addition to the heat-activated bond, consider decorative stitching around the perimeter to create a secondary fastener that resists peeling, especially on knees, elbows, or other high-wear zones. This combines the convenience of iron-on with the security of stitching.
For heavy fabrics like denim or canvas, you may want to reinforce the patch edges with a tight running or satin stitch. Stabilizing the area with a light interfacing can also help the patch hold firm after multiple washes. Applying these durable patch application tips ensures a long-lasting, ready-to-wear result.
Removal, Reapplication, and Safe Maintenance
If you ever need to remove a patch, gently heat the back with a hairdryer to soften the adhesive, then peel from the edge slowly. Expect some residual glue on the fabric, which you can clean with a fabric-safe adhesive remover or rubbing alcohol followed by washing.
When reapplying, start with a clean surface and repeat the steps for a secure bond. If you’re reusing a patch or applying it to a new garment, you can use a fresh protective layer and consider a quick stitch-around for added durability. Following these guidelines aligns with durable patch application tips and helps you get consistent results each time.
Frequently Asked Questions
How to apply iron-on patches on denim and other fabrics with Iron-On Embroidered Patches?
Prep the fabric (wash, dry, and iron to remove wrinkles). Position the Iron-On Embroidered Patches, then cover with a thin cotton cloth or parchment. Set your iron to a high cotton/linen setting with no steam and press firmly for 20–30 seconds, keeping the iron in full contact. Check the edges, re-press any lifting areas for another 10–15 seconds if needed, and let cool completely. For extra durability, sew around the edge after bonding.
What are the best fabrics for iron-on patches when using Iron-On Embroidered Patches, and how should you prep them?
Best fabrics are cotton, denim, and canvas or sturdy blends that respond well to heat-activated adhesion. Avoid delicate knits or silk; if you must use them, stabilize the area with interfacing or sew for extra security. Always pre-wash and press the fabric to remove finishes that could interfere with adhesion.
What are iron-on patch care tips to keep Iron-On Embroidered Patches looking new after washing?
Care tips include washing the garment inside out and air‑drying when possible. Use mild detergents and avoid bleach or fabric softeners on patches, as they can weaken the adhesive. After several washes, inspect for lifting and re‑apply heat with a pressing cloth if needed; you can also sew around the edge for added durability.
How do you remove iron-on patches safely and reapply Iron-On Embroidered Patches later?
To remove, apply gentle heat with a hairdryer to soften the adhesive and peel from the edge slowly. Remove residue with a fabric-safe adhesive remover or rubbing alcohol, then wash the garment. When reapplying, clean the surface and follow the same application steps; for extra security, consider stitching the edges after reattachment.
What are durable patch application tips to ensure Iron-On Embroidered Patches stay bonded through washes?
Ensure the patch edges are fully bonded by applying firm, even pressure for 20–30 seconds and allowing it to cool. Use a pressing cloth to protect the fabric, and if needed, reinforce with a tight zigzag stitch or whip stitch around the edge. On high‑wear fabrics like denim or canvas, stitching provides added longevity.
What durable patch application tips exist for combining Iron-On Embroidered Patches with stitching on high-wear areas?
Yes. To maximize durability, add stitching around the patch after heat bonding. Use a tight zigzag or satin stitch with matching thread, especially on sleeves, knees, or elbows. For knits, consider a light fusible interfacing behind the patch to stabilize the fabric before sewing.
| Topic | Key Points |
|---|---|
| What Iron-On Embroidered Patches Are | – Decorative fabric pieces with heat-activated adhesive on the back; embroidery adds texture and color, providing a professional look without sewing; when applied correctly, they form a strong bond that withstands wear and washing. Best used on cotton, denim, canvas, and sturdy blends. |
| Choosing the Right Patch | – Fabric compatibility: cotton, denim, canvas, sturdy blends; delicate knits or silk may require stabilizers or sewing for security. – Patch size/shape: Larger patches make a bolder statement; smaller patches suit sleeves, pockets, or collars. – Design and color: Choose designs that complement the garment; ensure backing doesn’t show through. – Backing and quality: Look for clean adhesive backing and dense embroidery that won’t fray or peel. |
| How to Apply Iron-On Patches: Step-by-Step | 1) Prepare fabric: wash/dry to remove sizing; iron to remove wrinkles. 2) Position patch. 3) Protect fabric with a thin cotton cloth or parchment. 4) Set heat: high cotton/linen, no steam. 5) Press firmly 20–30 seconds. 6) Check adhesion; re-press 10–15 seconds if needed. 7) Cool and secure; for extra durability, sew around edge (zigzag or whip stitch) especially on high-wear areas. |
| Sewing vs Iron-On: When to Add Stitching | Sewing around the edge increases longevity, especially with frequent washing or rough use. A small running stitch or tight satin stitch provides extra security and helps resist peeling. For heavy fabrics like denim or canvas, consider stitching as a backup to the heat bond. |
| Care & Maintenance for Longevity | – Wash inside out to protect edges. – Air dry when possible; if using a dryer, use low heat and remove promptly. – Avoid harsh chemicals; mild detergents and avoid fabric softeners on patches. – Check and reseal as needed after a few washes; reapply heat with a pressing cloth if edges peel. |
| Troubleshooting & Practical Tips | – Patch not sticking: ensure fabric is clean/dry; higher heat briefly if fabric tolerates it. – Edges lifting: re-press with a cloth; reinforce by stitching along the edge. – Patch on stretchy fabrics: stabilize with interfacing or sew around edges for durability. – Dark fabrics showing through: choose patches with light backing or place a coordinating fabric layer before pressing. |
| Popular Uses & Ideas | – Denim jackets/jeans for vintage or customized looks. – Backpacks, hats, bags for logos or interest. – Sweatshirts/hoodies for color blocks or themes. – Costumes or themed outfits for quick, clean patches without sewing. |
| Removal & Reapplication | To remove, apply gentle heat (hairdryer) to soften adhesive, then peel from the edge. Residual adhesive can be removed with a fabric-safe adhesive remover or rubbing alcohol, followed by washing. To reapply, repeat the above steps on a clean surface and consider adding stitching for extra security after reattachment. |
| Frequently Asked Questions | – Are iron-on patches permanent? They’re designed for durability, but longevity depends on fabric, washing, and whether you add stitching. – Can I apply to leather or coated fabrics? Adhesion is best on cotton/denim/canvas; leather/coated fabrics may require sewing for reliability. – How many patches can I apply at once? Space evenly, avoid overlap, and give each patch time to bond before washing. |
Summary
Table summarizes the key points of Iron-On Embroidered Patches: what they are, how to choose, the step-by-step application, care, troubleshooting, uses, removal/reapplication, and FAQs.