
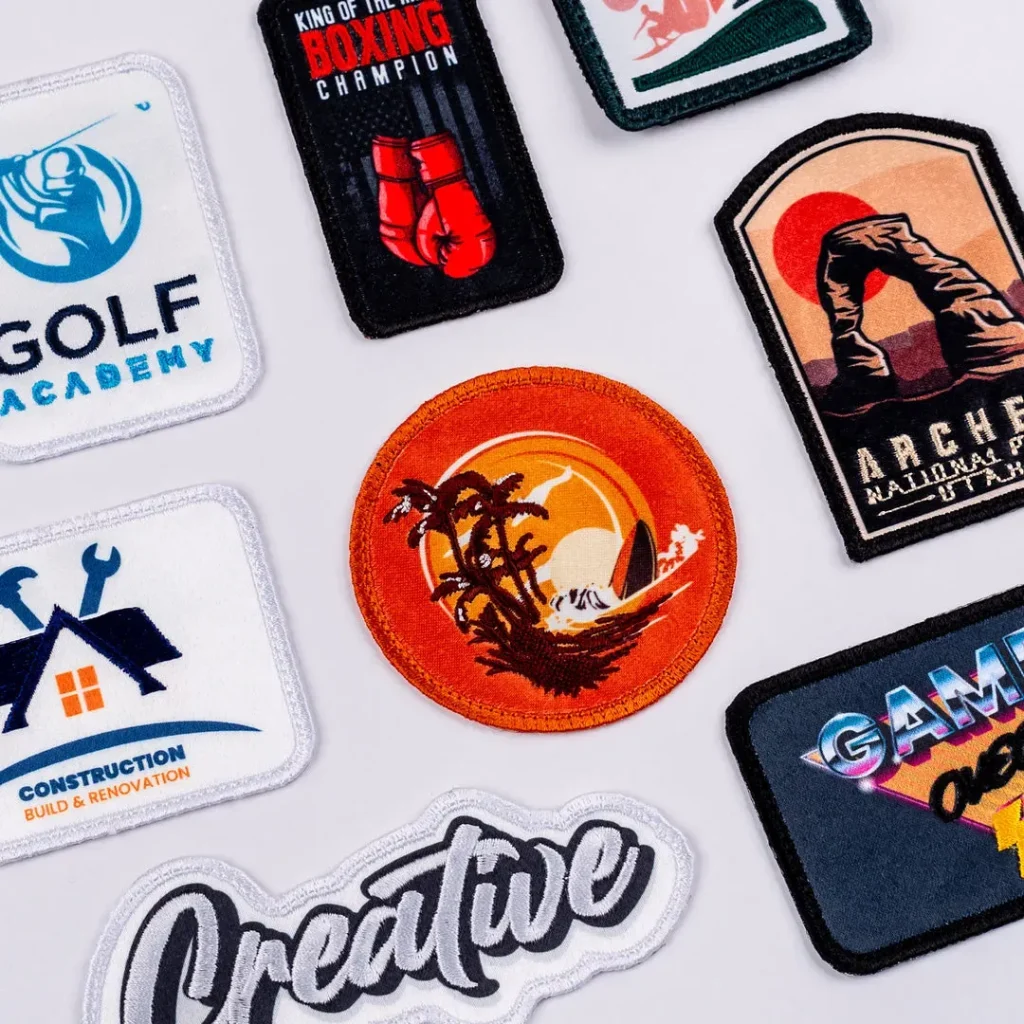
Custom embroidered patches have become a visible, durable way for brands, sports teams, clubs, and creators to showcase identity on apparel and gear. These patches offer versatility, from team insignia to event branding, with custom embroidered patches delivering lasting color and texture. Understanding the costs, sizing choices, and practical production steps helps you move smoothly from concept to finished patches. This guide weaves in terms such as custom patches costs, embroidery patches sizing, patch production tips, custom patches manufacturing, and embroidery patch pricing to help you compare suppliers. With clear goals and a reliable supplier, you can balance impact with budget while ensuring durability across garments.
Beyond the common terminology, these branding patches function as durable emblems or fabric insignias that add character to jackets, hats, and bags. Seen through an alternative lens, garment badges, fabric insignias, and embroidery emblems involve similar decisions about size, color, backing, and production timing, all of which influence unit costs and lead times. From a manufacturer’s view, the process centers on design, digitizing, proofing, and finishing within a structured patch production workflow. Understanding this cycle helps buyers translate pricing into value for teams, events, or product lines.
Cost Structure of Custom Embroidered Patches
When budgeting for custom embroidered patches, the main drivers of cost are size, stitch count, colors, backing, and quantity. The larger the patch and the more stitches required to render the design, the higher the cost will be. This is why custom patches costs is a frequent topic in supplier conversations. Digitizing—the upfront step that translates artwork into a stitch file—also adds a one-time setup fee, and more complex logos or text can push the price higher. If you plan to produce patches in multiple sizes or colorways, you may incur additional digitizing or setup fees for each variant.
Backing options and edge finishes influence overall price as well. Iron-on backings offer convenience but may require extra finishings for wash durability, while sew-on backings can add a bit to unit costs due to materials and finishes. Finishes such as merrow borders or laser-cut edges add to the final price but can be worth it for a polished presentation. Finally, quantity remains a powerful lever: tiered pricing often makes larger runs dramatically cheaper per patch, so consider split runs or pre-buying inventory to lock in favorable embroidery patch pricing while accounting for shipping, taxes, and potential artwork changes.
How Embroidery Patches Sizing Affects Quality and Pricing
Sizing directly influences both the visual impact and the cost of patches. The topic of embroidery patches sizing is routinely discussed when quotes are requested, because bigger patches require more stitching and longer production times. This typically elevates the per-patch price, especially for complex shapes or text that must remain legible from a distance.
Readable design at smaller sizes often drives higher costs due to the need to optimize letterforms and reduce crowding, which can require extra stitches and careful digitizing. For many projects, a 2–4 inch patch offers a practical balance between visibility and cost, while very large patches or highly detailed artwork can push per-unit costs up. When sizing decisions are made with an eye toward simplicity and bold contrast, you get a clean look without sacrificing impact.
Patch Production Tips to Streamline Manufacturing
Efficient patch production hinges on clear communication and precise planning. Patch production tips include providing clean, high-resolution artwork (vector files such as AI, EPS, or PDF), and specifying exact sizing and backing preferences up front to avoid costly revisions later. Bold, high-contrast color palettes with fewer colors can shorten production time and reduce material use, while standard shapes like circular, shield, and oval patches are typically more economical due to cutting and finishing efficiencies.
Pre-production proofs are invaluable. Request single-serve proofs to verify stitching density, color matching, and legibility before scaling to a full run. This proactive step helps catch issues early and prevents expensive rework, ensuring that the final patches meet expectations while keeping production costs in check under the umbrella of patch production tips.
Choosing Materials, Edges, and Backings for Durable Custom Patches
The material choice and edge finish set the tone for both the appearance and durability of patches. Base fabrics like twill, felt, and polyester blends influence texture, weight, and stitch tension, which in turn affect the overall look and wear resistance. The edge finish—merrow, laser-cut, or heat-cut—shapes the silhouette’s durability and finish, with merrow edges being popular for their clean, robust look.
Backing options also impact performance and cost. Iron-on backing offers convenience for enthusiasts and promotions, while sew-on backings provide reliability in active wear and industrial settings. For many projects, pairing a sturdy backing with a durable edge finish delivers the best long-term value, aligning with the broader goals of custom patches manufacturing.
Production Workflow: From Design to Finished Patch
A typical production workflow begins with design and approval, followed by digitizing the artwork into a stitch file. The quality of this step, along with how well the client communicates requirements, directly affects embroidery patch pricing and final clarity. Prototyping creates a tangible sample to verify color accuracy, stitch count, backing, and edge finish before committing to full production.
Once approved, the production run proceeds, and larger orders benefit from economies of scale that improve per-patch costs. Finishing steps—backing application, trimming, and packaging—round out the process, with attention to labeling and documentation that helps ensure consistency across shipments. This end-to-end view is central to successful patch manufacturing and can dramatically influence overall project timelines and cost efficiency.
Budgeting and Getting Accurate Quotes for Embroidered Patches
Budgeting for patches involves understanding MOQs, lead times, and the impact of color counts and sizes on price. When gathering quotes, provide precise details such as final patch size, shape, backing type, total quantity, and required proofs to ensure accurate comparisons. Asking for a line-item breakdown—covering digitizing, setup, color changes, and finishing—helps you see where costs accumulate and where you can optimize for embroidery patch pricing.
To maximize value, compare offers from multiple suppliers and consider total cost of ownership, including shipping, taxes, and potential artwork revisions. Discuss options like split runs, multi-size quotes, or colorway variations to unlock better pricing. Building a relationship with a trusted supplier who can advise on design optimization and material choices often yields better lead times, more predictable production cycles, and stronger post-sale support, contributing to smarter overall budgeting and custom patches costs.
Frequently Asked Questions
What factors most influence custom patches costs when ordering custom embroidered patches?
Key drivers include patch size, stitch count, number of thread colors, backing choice, quantity, and digitizing/setup fees. Larger patches and more stitches raise costs, while digitizing is typically a one-time cost; volume discounts apply for larger runs, and finishings like merrow borders can add to the price.
How does embroidery patches sizing impact both readability and price for custom embroidered patches?
Sizing affects stitch density and production time; smaller patches must maintain legibility, which can require more precise digitizing and higher per-piece costs. Larger patches increase stitching and finish costs, but may benefit from economies of scale when ordered in volume.
What are practical patch production tips to optimize costs and quality for custom patches manufacturing?
Provide clean vector artwork, specify exact size and backing, limit colors, choose standard shapes, and request single-serve proofs before full runs. These patch production tips help control embroidery patch pricing by reducing digitizing changes, minimizing rework, and speeding setup.
What should you know about the custom patches manufacturing process and how it affects cost and lead times?
A typical process includes design approval, digitizing, prototyping, production, and finishing; each stage can add costs and time. Clear artwork, accurate quantity, and upfront decisions on backing and edge finish help minimize surprises and align embroidery patch pricing with your timeline.
How can I estimate embroidery patch pricing for a multi-color design with different backings across my custom embroidered patches?
Start with digitizing/setup, then add per-patch costs for size, color count, and backing type; request quotes that itemize digitizing, color changes, and finishing. Larger quantities reduce per-patch pricing, while more colors and stricter backings increase it.
What role do MOQs, lead times, and proofs play in controlling custom patches costs for events or teams?
MOQs and lead times determine baseline costs and scheduling; obtaining proofs helps verify stitching, color, and legibility before a full run. Providing precise final patch size, shape, backing, and color count up front helps suppliers quote accurately and manage custom patches costs.
| Topic | Key Points |
|---|---|
| Costs & Cost Drivers | Size, stitch count, colors, backing, and quantity drive price; digitizing/setup fees; finishes; shipping/taxes; tiered pricing; larger runs reduce per-patch cost; consider split runs. |
| Sizing & Design Impact | Size affects stitch count and price. Common 2–4 inch patches; complex or large shapes increase cost; ensure readability at small sizes; bold, simple designs can be cost-effective. |
| Backings & Edges | Backings: iron-on vs sew-on. Finishes: merrow (edge) or laser-cut. Edges influence durability and price; ensure compatibility with fabric. |
| Materials & Finishes | Base fabrics include twill, felt, and polyester blends. Fabric affects tension, stitch density, and drape. Edge options and finishings impact appearance and cost. |
| Production Workflow | Design & approval, digitizing, prototyping, production, finishing & delivery. Each stage affects cost, accuracy, and timing. |
| Quality & Durability | Stitch density, thread quality, and backing compatibility drive longevity. For wash-heavy or outdoor use, consider UV-resistant threads and colorfastness. |
| Pricing Strategies | Balance upfront costs with long-term value. Use fewer colors or standard shapes to cut costs; iron-on backings can lower expenses; account for MOQs and rush charges. |
| Quotes & Lead Times | Provide final size, shape, backing, colors, quantity, proofs; request line-item breakdowns for digitizing, setup, color changes, finishing; plan ahead to avoid rush fees. |
| Practical Scenarios | 2.5″ round patch vs 4″ with more colors/text; 1,000 vs 100 patches; small runs with intricate details cost more per patch due to digitizing and color changes. |
| Supplier Relationships | Build a trusted supplier relationship; request samples, compare texture and stitching density, and obtain quotes for multiple sizes/colorways to understand cost variability. |
Summary
Conclusion: Custom embroidered patches offer a versatile mix of branding, durability, and flair. By understanding the factors that drive costs, making informed sizing decisions, and applying practical production tips, you can achieve outstanding patches that meet budget and timeline requirements. When planning your project, reference terms such as custom patches costs, embroidery patches sizing, patch production tips, custom patches manufacturing, and embroidery patch pricing to guide conversations with suppliers and optimize your results. With careful planning and a reliable supplier, your patches can elevate your brand and resonate with your audience for years to come.