
DTF transfers on fabrics have reshaped how designers and crafters approach garment customization. If you’re wondering how to apply DTF transfers, this guide dives into best practices for a clean, durable finish. You’ll discover practical DTF transfer techniques that balance color brightness with a soft hand. This article also offers DTF printing on fabrics tips to help you prep, press, and care for your designs. Finally, we cover DTF heat press settings tailored to a range of fabrics so results stay vibrant wash after wash.
Alongside DTF, digital textile printing on fabrics leverages the same film-based transfer concept to deliver vibrant, durable graphics on garments. Think of it as an on-demand garment graphics method that uses a printed transfer sheet, a bonding adhesive, and a calibrated heat press to fuse images to cotton, polyester, or blends. LSI-friendly terms include fabric transfer printing, heat-applied graphics, and ink-on-film methods, which help you find broader resources for prep, curing, and care. Whether you call it digital transfer or fabric-on-film printing, the core idea remains the same: precise alignment, appropriate care, and reliable post-press finishing to preserve color and texture.
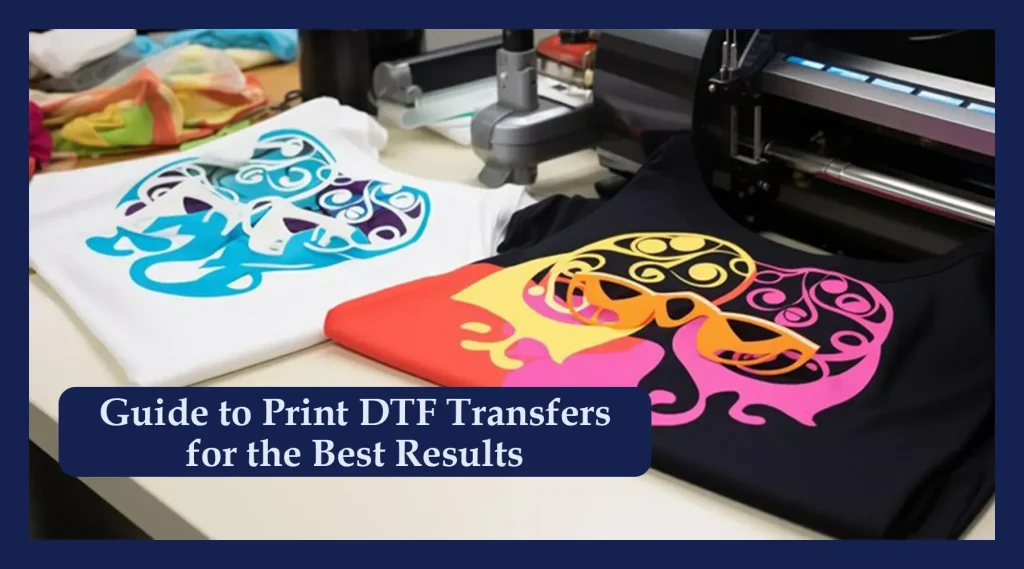
DTF transfers on fabrics: From Preparation to Perfection
DTF transfers on fabrics hinge on meticulous preparation. Begin with clean, dry fabric free of dust and oils, then pre-wash to relax fibers and reduce edge lifting. The work surface should be flat and well-marked, with a silicone sheet ready to ensure even heat distribution. This foundation sets the stage for consistent color, sharp edges, and durable adhesion.
Understanding how to apply DTF transfers starts here: proper alignment, protective barrier placement, and controlled heat are essential. In practice, choose films and inks that suit your fabric, and test a small swatch before committing to a full run. By mastering the basics, you’ll see faster, crisper results and fewer reprints.
Choosing the Right DTF Transfers and Inks for Your Garments
Fabric compatibility drives success. Select a DTF transfer made for natural fibers or synthetics depending on your base material. Different films adhere with varying strength, and the ink or powder batch affects vibrancy and wash durability. To up your success rate, study the fabric’s fiber content and run a small test to observe tack, gloss, and color retention. These choices reflect practical DTF transfer techniques.
Ensure the ink, film, and heat-press compatibility with your platen size and garment type. Fresh ink and reliable curing help colors stay bright through washes. Try different transfer options and track results. Here are DTF printing on fabrics tips: test adhesion on similar fabrics, document settings, and adjust as needed.
Step-by-Step Application: Align, Cover, and Press with Confidence
Implementing the transfer requires precision. Align the design using registration marks or a folding guide so edges sit flat. A clean, flat fabric surface helps prevent shifts during press, and a protective barrier—such as a silicone sheet—parries scorching and pigment migration.
Apply heat with steady pressure for the recommended time, typically 12-15 seconds at 160-170 C. Peel timing matters; cold peels are common for DTF to keep edges crisp, though some formulations respond to a warm peel. If you notice curling or edge lifting, re-press on a test swatch with adjusted pressure before proceeding.
Optimizing DTF Heat Press Settings for Different Fabrics
Temperature, pressure, and time must be tuned to fabric weight and fiber content. A reliable baseline is 160-170 C with medium to firm pressure for 12-15 seconds, but lighter fabrics may require gentler force or shorter dwell times. Always start with a test on a similar material to refine your numbers.
For dark or coated fabrics, you might use a white underlay or base to maintain opacity, and you may need a slightly longer dwell or different pressure. Maintain consistent heat and platen contact, and consider frequent calibration of your heat press to ensure your actual temperature matches the readout.
Post-Press Care and Finishing for Long-Lasting Vibrancy
After pressing, allow the garment to cool completely before handling. Perform a final press for a few seconds to ensure full contact, then turn the item inside out for washing. DTF printing on fabrics tips suggest washing inside out with cold or warm water and using mild detergents to preserve vibrancy.
Store your finished products flat or neatly folded to avoid edge distortion, and avoid high-heat tumble drying if possible. Regular care prevents delamination and helps your designs retain color punch through repeated wear.
Troubleshooting Common DTF Issues with Practical Fixes
Even with care, problems can occur. Faint or incomplete transfers, edge lifting, or color halos are common indicators that adhesion was insufficient or the heat or timing drifted.
Address issues by adjusting pressure and dwell time, verifying film and fabric compatibility, and re-running a small swatch before proceeding. Document the settings for future batches and consider segmentation of complex designs to preserve sharp edges. These are practical DTF transfer techniques for robust results.
Frequently Asked Questions
What are DTF transfers on fabrics and why choose them for garment customization?
DTF transfers on fabrics are a versatile digital textile printing method that delivers full-color, high-resolution graphics with a soft hand. They offer vibrant color, strong adhesion, and compatibility with tees, hoodies, bags, and more. Key factors for success include using high-quality transfer films and inks and applying heat correctly to ensure durable results.
How to apply DTF transfers on fabrics: a step-by-step guide
Prep the fabric (clean, dry, and free of oils). Align the transfer precisely, then place a protective barrier such as a silicone sheet. Apply heat with consistent pressure for about 12-15 seconds at 160-170 C (320-338 F). Use the recommended peel timing (cold peel is common for DTF). Re-press if edges lift and test on a swatch before full runs.
What are the best DTF transfer techniques for durable, vibrant results?
Choose a transfer and ink combination suited to your fabric, and test a small sample before production. Ensure proper adhesion by maintaining a flat, clean surface, using a barrier sheet, and applying consistent heat and pressure. Follow dwell times (typically 12-15 seconds at 160-170 C), and use correct peel timing to preserve edge definition.
What DTF heat press settings should you use for different fabrics?
A reliable starting point is 160-170 C (320-338 F) with medium to firm pressure for 12-15 seconds. Lighter fabrics usually need gentler pressure; heavier blends can tolerate more. Always perform a test on a similar fabric to refine settings and adjust for fabric weight and transfer thickness.
DTF printing on fabrics tips: common issues and troubleshooting
Common issues include faint transfers, edges lifting, color bleed, and sticky surfaces. Troubleshoot by increasing pressure and verifying dwell time, ensuring the fabric is flat and dry, and using barrier protection. Check fabric compatibility, keep heat stable, and perform post-press checks on a test swatch.
What post-press care guidance helps preserve DTF transfers on fabrics?
After application, perform a final press for a few seconds, then allow the garment to cool completely. Wash inside out in cold or warm water, avoid harsh detergents and chlorine bleach, and dry on low heat or air dry. Proper care helps prevent delamination and keeps color vibrancy wash after wash.
| Topic | Key Point | Practical Tip |
|---|---|---|
| Overview | DTF transfers enable full-color, high-resolution graphics with soft hand feel. | Plan workflow from fabric prep to post-press care to maximize durability. |
| Fabric preparation | Clean, dry fabric; pre-wash/dry cottons and blends; flatten textured surfaces. | Pre-press lightly to flatten nap; keep work area clean; use barriers and protective sheets. |
| Transfer and ink selection | Match transfer/ink to fabric type; ensure compatibility with heat press and film. | Test on similar fabric before batch; ensure ink/powder freshness. |
| Application steps | Align precisely; protect design with barrier; apply heat with even pressure; follow dwell time and peel timing. | Typical: 12-15 seconds at 160-170 C; cold peels often preferred; adjust after testing. |
| Temperature/Pressure/Time | Controlled heat/pressure yield best results; adjust for fabric weight and film thickness. | Start at 160-170 C with medium-firm pressure; 12-15 seconds; perform test runs. |
| Post-press care | Cool fully; wash inside-out; cold/warm water; low heat or air dry. | Add a brief final press for full contact; avoid harsh detergents and chlorine bleach. |
| Troubleshooting | Faint transfer, edge lifting, color bleed, sticky surface are common issues. | Increase pressure/dwell; ensure fabric is flat; verify ink/film compatibility; control cooling. |
| Fabric tips | Cotton blends are forgiving; poly blends need calibrated heat/time; dark fabrics may need white underlays. | Match heat tolerance; consider white toner base on dark fabrics. |
| Quality control | Check alignment, edge integrity, color accuracy, softness; keep process logs. | Inspect from six feet away; record fabric types, batches, press settings. |
| Advanced optimization | Calibrate heat press; keep platen clean; use teflon sheets; consider conveyor systems for large runs. | Segment complex graphics; test print for accuracy; maintain consistent workflow. |