
Screen Printing 101 is more than just a kit of steps; it’s an approachable doorway into the art and craft of transferring ink through a mesh screen onto textile goodies. Whether you’re a total beginner, exploring beginner screen printing, or starting a small side business, this guide covers the essentials you need to know about the process. You’ll learn how screen printing works, what gear is required, how to prep designs, and practical tips to avoid common mistakes. From choosing ink types to selecting substrates and the basics of curing, the overview helps you build confidence before your first run. By the end, you’ll have a solid foundation for producing crisp, durable prints on T-shirts and beyond.
For a broader perspective, think of screen printing as a printmaking method that uses a mesh stencil to transfer ink onto fabric. This approach, often referred to as silkscreen basics or screen-printing, links color separations, emulsion handling, and curing to reliable, repeatable results. Manual vs automatic screen printing: starting with the hands-on, manual practice builds technique while automation offers higher throughput once you’re ready to scale. Even as you learn, you can apply these ideas to apparel and other print projects, expanding your repertoire beyond simple printing.
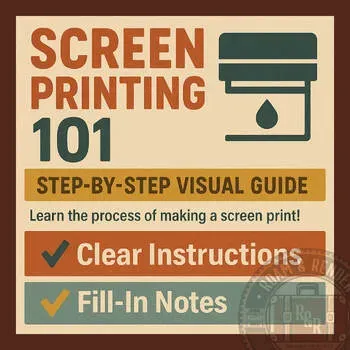
Screen Printing 101 for Beginners: Master the Silkscreen Basics
Screen Printing 101 is a gateway into the art and craft of transferring ink through a mesh screen onto textile goodies. This section helps beginners understand the silkscreen basics, from how a screen is built to how the stencil blocks ink. By focusing on fundamentals, you can approach your first projects with confidence and avoid common rookie mistakes.
As you explore t-shirt printing and other substrates, you’ll begin to see how the core workflow fits together: choosing the right screen and emulsion, preparing your design, exposing and rinsing the stencil, and printing with a controlled squeegee stroke. This beginner friendly approach is designed to build a solid base in Screen Printing 101 while keeping the process approachable and satisfying. For the beginner screen printing journey, a repeatable, easy-to-follow workflow is essential.
Essential Screen Printing Supplies for Beginners: Tools, Inks, and Setup
Starting with the right screen printing supplies for beginners saves time and frustration. A practical beginner screen printing starter kit typically includes screens and frames with different mesh counts, photosensitive emulsion, a light exposure setup, plastisol or water-based inks, squeegees and flood bars, and a clean workspace. Having these items on hand helps you practice consistently and reduces the guesswork.
Beyond the basics, think about garments and substrates, pre-washed cotton tees, and simple cleaning tools. Investing smartly in durable squeegees and a reliable heat source now pays off later as you expand toward more complex projects and multi-color prints. These screen printing supplies for beginners set you up for steady progress.
T-Shirt Printing Fundamentals: From Artwork to First Print
In t-shirt printing, success starts with the artwork. For beginners, vector-based designs (AI or EPS) translate cleanly into screens, while raster images can work if they are high resolution and have clean edges. You’ll also learn about color separations for multi-color prints, ensuring each color has its own screen and that registration marks keep layers aligned during the run.
Next comes preparing your screens and exposing them correctly. Coat with emulsion, place the design on the screen, expose to light, rinse to reveal the stencil, and dry. This workflow mirrors the content of the design process, and using halftones can be discussed as a technique to simulate shading with few screens.
Manual vs Automatic Screen Printing: Picking Your Starter Path
One of the most common questions for beginners is whether to start with manual or jump to an automatic press. For practice and learning the fundamentals, manual vs automatic screen printing is the safer entry point because you control pressure, squeegee angle, and ink viscosity.
As you gain confidence and volume, you can consider an automatic press to boost throughput, but it’s wise to master the basics first. This aligns with Screen Printing 101 principles and keeps the learning curve manageable.
Troubleshooting and Quality: Common Challenges in Beginner Screen Printing
Even modest projects can reveal common issues like faint prints, bleeding, pinholes in the stencil, or smudging after cure. For each problem, sensible fixes exist: adjust ink viscosity, check screen tension, refine exposure, and verify garment prep before printing.
Developing a quick diagnostic routine—test prints, color checks, and curing verification—helps you catch problems early. By iterating with small runs and referencing the beginner screen printing guidelines, you’ll improve consistency and long-term durability.
Beyond T-Shirts: Expanding Projects with Screen Printing 101
Screen printing opens doors to tote bags, posters, hats, and more, expanding your hobby into small business ideas. The same workflow you learned for t-shirt printing applies, just adapted to different substrates and inks. Experiment with natural fibers for truer color and try a few specialty inks like metallics or glow-in-the-dark options.
As you grow, building a product portfolio and finding a local makerspace or workshop can accelerate your progress in Screen Printing 101. The practical experience from this guide helps you branch into new projects while maintaining quality and consistency.
Frequently Asked Questions
What is Screen Printing 101 and why is it ideal for beginner screen printing?
Screen Printing 101 is a structured beginner’s guide that explains how screen printing works, the essential gear, and practical steps from design prep to curing. It distills silkscreen basics into actionable tasks you can practice with a small setup. It’s ideal for beginner screen printing because it builds a solid foundation before moving to more complex color work or higher-volume printing.
In Screen Printing 101, should a beginner start with manual vs automatic screen printing?
For most beginners, starting with manual screen printing is best to learn fundamentals like squeegee technique, ink viscosity, and registration. It’s cost-effective and scalable, allowing you to master the basics before investing in an automatic press. When you’re ready for higher volume, an automatic setup can improve throughput while maintaining quality.
What are the essential screen printing supplies for beginners covered in Screen Printing 101?
A practical starter kit includes screens and frames, emulsion, exposure gear, inks (plastisol or water-based), squeegees, garments, cleaning supplies, and curing equipment. Screen Printing 101 emphasizes selecting mesh counts appropriate for different line weights and starting with pre-washed tees to reduce issues. With these screen printing supplies for beginners on hand, practice becomes smoother.
What ink options should I know for t-shirt printing in Screen Printing 101, and how do plastisol vs water-based inks compare?
Plastisol inks sit on the fabric and cure with heat, while water-based inks soak in for a softer hand. Screen Printing 101 covers trade-offs in color range, wash durability, and application, helping you choose based on your project, substrate, and desired feel. For many beginners, plastisol is the easiest to start with.
How do I prepare artwork in Screen Printing 101 to achieve clean color separations for a multi-color t-shirt printing project?
Start with high-contrast designs, preferably vector-based; plan color separations with each color on its own screen. Screen Printing 101 emphasizes testing on inexpensive fabric, using registration marks, and performing color separations to ensure accurate layering and alignment. This groundwork leads to crisp, print-ready results.
What common challenges do beginners run into in Screen Printing 101 and how can I troubleshoot?
Common issues include faint prints, ink bleed, pinholes in the stencil, and smudged curing. Screen Printing 101 guides you to check ink viscosity, screen tension, exposure, and curing temperature/time, then run a small test before full production. With practice and careful calibration, most problems are solvable.
| Topic | |
|---|---|
| What is Screen Printing? |
|
| Key Concepts You’ll Encounter in Screen Printing 101 |
|
| Essential Tools & Materials for Beginners |
|
| Design and Preparation: Getting Your Artwork Ready |
|
| From Design to Screen: Preparing Your Screens and Exposures |
|
| The Screen Printing Process: A Step-by-Step Guide |
|
| Multi-Color Prints: Layering and Registration |
|
| Manual vs Automatic Screen Printing: Beginner Guidance |
|
| Common Challenges & Troubleshooting |
|
| Care and Maintenance of Your Setup |
|
| Beyond T-Shirts: Other Projects |
|