
Designing Custom Patches is a strategic way to embed a brand story into everyday items, turning merchandise into a walking billboard. When done well, patch design strengthens recognition, builds trust, and creates visual consistency across products and campaigns, making it a crucial component of custom patches branding and patch customization strategies. This guide highlights practical decisions—from patch type and backing to color fidelity and production considerations—that influence embroidery patches for marketing and branded patches for products. By aligning patch design with brand identity and audience touchpoints, you can extend your story from uniforms to hats, bags, and events. Read on for actionable steps and design tips that help any brand achieve lasting recognition through thoughtful patch design.
In other words, patch creation or badge design can be framed as a strategy to reinforce your brand on apparel and accessories. Emblem development, embroidered patches, and woven patches offer durable touchpoints that travel with customers from events to everyday wear. This approach maintains a cohesive visual language across product lines, packaging, and campaigns, using consistent color, shape, and texture to strengthen recall. Additional terms such as branding patches for products and patch artwork act as semantic signals that help audiences and search engines connect the idea to your core message.
Designing Custom Patches: Crafting a Brand Story that Travels
Designing Custom Patches is more than a decorative touch—it’s a deliberate way to embed your brand narrative into everyday items. By choosing shapes, colors, and symbols that echo your core values, you create patches that customers carry with them on uniforms, backpacks, jackets, and hats. When designed thoughtfully, these patches become walking billboards that reinforce recognition and trust across touchpoints. This approach supports custom patches branding by ensuring every patch communicates a coherent brand story and aligns with broader marketing goals.
To maximize impact, treat patch design as a strategic element of your marketing mix. Consider how the patch will be worn, who will see it, and how it complements other brand assets. This is where patch customization strategies come into play—defining guidelines for size, color fidelity, and finish ensures consistency. The result is a patch ecosystem that feels intentional rather than random, boosting recall across products and campaigns.
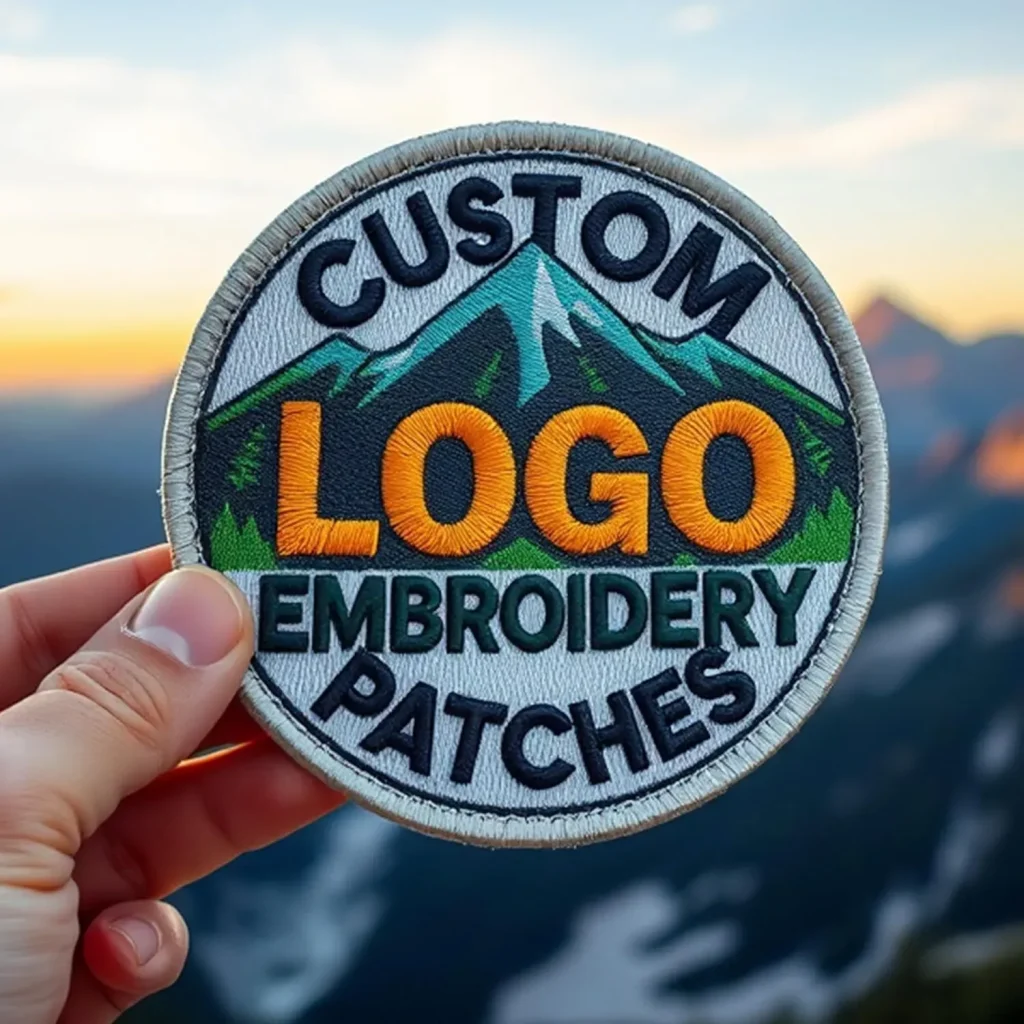
Patch Types and Backings: Embroidered, Woven, and Chenille for Branded Patches for Products
Choosing the right patch type is foundational to patch design that resonates with your audience. Embroidered patches deliver bold lines and a classic look, making them ideal for logos with strong shapes. Woven patches offer finer detail and smoother edges, which suits intricate branding and small text. Chenille patches provide a plush, tactile feel that can amplify sports branding or youthful, energetic brands. Each type pairs with backing options to affect durability and wearability.
Beyond the patch surface, consider backings and attachment methods. Iron-on backings are convenient for quick promotions, sew-on backings offer durability for uniforms, and Velcro or detachable options enable interchangeable branding across items. When you plan patch customization strategies, weave these practical choices into your design so that the final product remains visually appealing while meeting real-world needs as branded patches for products.
Color Fidelity and Typography: Patch Design Ideas for Consistent Branding
Color reliability is critical for brand consistency. Color matching to your brand palette, plus Pantone verification, helps ensure that threads reproduce your intended look across production runs. Typography also matters: if a patch includes text, select a legible, bold typeface that remains readable at small sizes. This aligns with patch design ideas that prioritize clarity over intricate details that might blur after stitching.
Imagery and typography should complement each other, with simple icons or mascots that convey your brand essence at a glance. Test color combinations on different fabrics and consider how stitching count affects detail. These steps reinforce custom patches branding by preserving a trustworthy, recognizable appearance across all items and campaigns.
From Concept to Production: A Step-by-Step Patch Customization Strategy
Begin with defining brand identity and patch goals: decide whether the patch rewards employees, recognizes fans, or promotes a product line. Clarify how the patch will be worn and who will see it most. This sets the direction for the entire design and production journey.
Next, select the patch type, prepare a clean vector logo optimized for embroidery or weaving, and determine size and shape that balance visibility with wearability. Build a color map aligned with your brand palette, verify color fidelity with the manufacturer, and decide on backings and attachment methods. Create proofs and iterate with digital and physical samples to ensure the final patch supports your patch customization strategy before full production.
Embroidery Patches for Marketing: Driving Engagement with Wearable Brand Elements
Embroidery patches for marketing transform merchandise into tangible sponsorships and social prompts. Worn at events, on staff uniforms, or across branded gear, these patches deliver high visibility in real-world settings, extending your reach beyond traditional ads. When designed with marketing goals in mind, they become reusable touchpoints that reinforce your brand identity wherever customers go.
Real-world campaigns benefit from cohesive batch testing, durable threads, and consistent color matching to maximize impact. Case-driven design encourages using patches as collectible elements or limited-edition drops, which can fuel fan engagement and social sharing. This approach supports the broader strategy of embroidered patches for marketing while aligning with overall branded patches for products and marketing initiatives.
Maintaining Custom Patches Branding Across Products and Campaigns
Consistency is essential for recognition. Use the same patch type, size range, and border style across products to create a cohesive family look. Maintain uniform color calibration across production runs and insist on proofs for new batches to prevent drift that could weaken brand identity. When customers encounter patches across multiple touchpoints, a consistent visual identity reinforces trust and recall.
Best practices include planning a modular patch system for multi-logo lines, validating color translations with manufacturers, and testing patches on target fabrics. Guard against common mistakes like overly detailed designs that lose legibility at small sizes, or mismatched backings that fail under wear-and-tear. A disciplined approach to patch customization strategies helps sustain custom patches branding across campaigns and product lines.
Frequently Asked Questions
How can Designing Custom Patches support a brand’s custom patches branding strategy?
Designing Custom Patches should align with your brand identity, goals, and audience. Start by defining what the patch communicates, choose a patch type that fits the product line, and ensure color fidelity through a Pantone-based map. Use proofs and consistent border and sizing to build recognition across uniforms, hats, and bags, turning merchandise into a walking billboard.
What patch design ideas should guide Designing Custom Patches for marketing purposes?
These patch design ideas emphasize bold shapes, legible logos, high-contrast colors, and simple typography. Keep detail to what reads well at small sizes, pair imagery with concise text, and choose a distinctive patch shape with a Merrow border to create a strong, instantly recognizable look across campaigns and product lines.
Which patch types and backings are most effective for embroidery patches for marketing across products?
Embroidery, woven, and chenille patches each offer a different feel. Embroidered patches deliver bold lines, woven patches capture finer detail, and chenille patches provide a plush texture for sports or youth brands. Backings such as iron-on for quick releases, sew-on for durability, or Velcro for interchangeability expand how branded patches can be used on products.
How do patch customization strategies ensure consistent branding across multiple products?
Patch customization strategies should standardize patch type, size ranges, and border styles, and maintain color calibration across batches. Use a single brand color map, insist on proofs for new runs, and consider modular patch systems so variations stay aligned with the core identity.
What design elements are essential when creating branded patches for products to reinforce recognition?
Ensure the patch reflects brand identity, keep the logo legible at patch size, and match colors to the brand palette using Pantone. Choose a distinctive shape and a clean border, use legible typography, and keep imagery simple and evocative to convey brand values at a glance.
What are the practical steps to move from concept to production in Designing Custom Patches?
Start by defining brand identity and patch goals, choose patch type, prepare a clean vector logo, determine size and shape, build a color map with Pantone references, decide on backings, request proofs and samples, and plan distribution. This step-by-step approach helps ensure stitch count, color fidelity, and overall impact before full production.
| Aspect | Key Points |
|---|---|
| Introduction | Designing Custom Patches embed a brand story into everyday items; patches travel with customers, sit on uniforms, backpacks, jackets, and hats, turning merchandise into a walking billboard; patches strengthen recognition and create visual consistency across products and campaigns; this guide covers strategy, design decisions, production considerations, and practical tips to boost brand recognition. |
| Why patches matter for brand recognition | A well-executed patch embodies brand values, communicates quality, and creates memorable touchpoints; patches offer high visibility in events, workplaces, and daily life; their durability helps logo and colors stay visible longer; designing patches should align with brand identity and marketing goals and tie to how audiences interact with products and teams. |
| Choosing the right patch type | Types include embroidered, woven, and chenille patches; embroidery delivers bold lines for logos with strong shapes; woven patches enable finer detail and small text; chenille patches offer a plush feel for sports teams and youthful brands; backing options include iron-on, sew-on, and Velcro; plan for wear, care, and where the patch will live. |
| Design elements that reinforce brand recognition | Maintain fidelity to brand identity; ensure logo is legible at the patch size; color fidelity with Pantone matching; distinctive shape and Merrow border; test multiple shapes and borders; typography and imagery should be simple, legible, and evocative; consider stitch count for embroidery. |
| From concept to production: a step by step guide | 1) Define brand identity and patch goals: articulate what the patch should communicate and who will see it; 2) Select patch type; 3) Prepare a clean vector logo; 4) Determine size and shape; 5) Choose colors and ensure color fidelity; 6) Decide on backings and attachment; 7) Create proofs and iterate; 8) Plan distribution and usage. |
| Practical design tips for best results | – Aim for simplicity on small or distant patches; bold shapes and strong color blocks. – Prioritize legibility with bold type and ample spacing. – Protect your branding with guidelines and consistent positioning. – Check apparel compatibility across fabrics. – Plan for variations with modular patch systems. – Use durable threads and backing to extend longevity. |
| Best practices for consistent branding across patches | Use the same patch type, size range, and border style across products; maintain uniform color calibration across production runs; insist on proofs for new batches; consistent branding across touchpoints reinforces recognition and trust. |
| Common mistakes and how to avoid them | Overly detailed patches reduce legibility; clashing colors reduce visibility; insufficient backing strength leads to peeling; color drift across batches weakens recognition. Mitigate by simplifying, testing colors, and using reliable manufacturers. |
| Case examples of patch driven branding success | Sports brands using embroidered patches across jerseys, hats, and bags create collectible elements that boost engagement; lifestyle brands using woven patches on limited edition backpacks achieve crisp detailing and loyalty. |
| Design checklist for Designing Custom Patches | – Align with brand identity and campaign goals; – Choose the patch type that fits voice and use case; – Prepare a clean vector logo optimized for embroidery or weave; – Select an appropriate size and shape; – Build a precise color map and verify Pantone matches; – Pick backings and attachment methods; – Request proofs and validate stitch count and finish; – Plan distribution; – Test patches on target fabrics and adjust as needed. |
Summary
Designing Custom Patches offers a highly tangible way to boost brand recognition. By choosing the right patch type, mastering design elements, and ensuring production quality, brands can extend their presence across products, uniforms, and merch. A thoughtful patch strategy turns simple fabric branding into enduring recognition that travels with customers and signals brand values at a glance. With careful planning, testing, and iteration, patches become a powerful element of your overall branding and marketing mix, delivering long term impact for your brand.