
In the realm of event marketing, custom roll-up banner design is a powerful way to grab attention, convey a clear message, and drive action. Following established design guidelines helps ensure legibility from a distance, readability up close, and consistency across venues. A well-crafted banner creates a visual handshake with your audience, projecting brand values while remaining practical for fast setup and repeated use, following roll-up banner layout best practices. Color choices and typography are not decorative extras; banner color psychology and typographic hierarchy shape perception, emphasize key messages, and improve recall under varied lighting. By applying these layout and production considerations, you create a banner that performs in real-world environments and reinforces your brand message.
In other terms, the pull-up banner serves as portable exhibit signage that anchors a booth and invites passersby to explore more. From this perspective, the design benefits from a clear visual hierarchy, legible type, and careful color choices that carry the brand across different venues. When teams prepare for printing, they should keep scalable artwork, consistent branding, and production-friendly file formats in mind to ensure a seamless handoff.
Custom Roll-Up Banner Design: Creating a Lasting First Impression
In the world of event marketing, a custom roll-up banner design serves as a powerful touchpoint that travels across venues and engages attendees long before a conversation begins. When you invest in tailored design, you’re shaping a first impression that communicates your brand story with clarity, from a distance in the venue hall to up-close interactions at the booth. A well-executed design balances visual impact with practicality, ensuring legibility and on-brand messaging whether viewed from afar or in a scrolling sequence of content.
This approach is guided by core roll-up banner design guidelines that emphasize a concise message, strong typography, and purposeful color choices. By planning with print-ready banner design in mind, you can ensure that the final output translates reliably from screen to print, maintains color integrity under venue lighting, and aligns with your broader branding. The result is a banner that looks great up close and performs at distance, supporting brand recognition and a clear call to action.
Roll-Up Banner Design Guidelines: Color Strategy and Accessibility
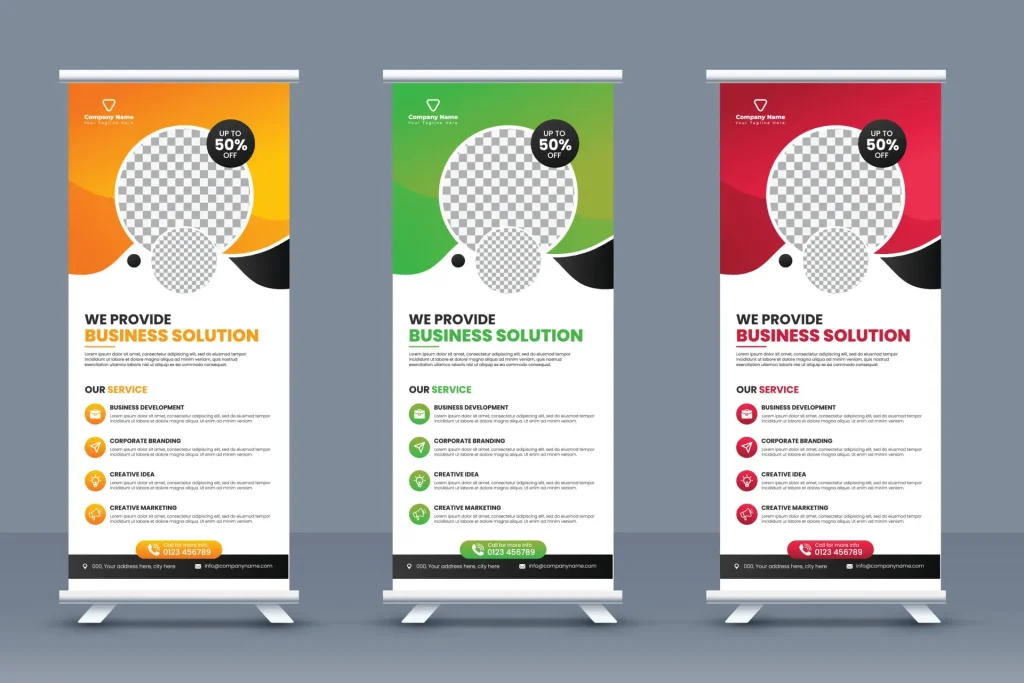
Color strategy sits at the heart of banner effectiveness. Establishing a primary brand color with a contrasting secondary palette helps headlines and body copy remain legible from a distance, while color psychology informs the emotional tone—red for urgency, blue for trust, green for growth, and orange for energy. In practice, you’ll test these color pairings under venue lighting to ensure consistency between digital previews and print proofs, preventing color shifts that can dilute the intended message.
Beyond aesthetics, accessibility is essential. Achieving sufficient contrast between text and background aligns with WCAG guidelines and improves readability for attendees with diverse visual abilities. As part of roll-up banner design guidelines, consider print-ready proofs that verify color contrast under real lighting conditions, and use high-contrast combinations to preserve legibility across spectators at various viewing distances.
Typography for Banners: Choosing Typefaces and Hierarchy for Clarity
Typography is a critical signal of brand identity and readability. The banner should use a maximum of two complementary typefaces—typically one for the headline and one for body copy—to maintain a clean, coherent look. Prioritize a bold, legible headline for quick recognition, while body text remains readable at distance with appropriate sizing and clear letterforms.
A well-considered typographic hierarchy guides readers through the message from top to bottom, aided by careful kerning, line length, and tracking. For banners, line lengths should be kept to a readable range, and spacing should prevent crowding on the strip of real estate you have. Clear typography for banners is a foundational component of the design, ensuring the message lands quickly and remains on-brand across settings.
Roll-Up Banner Layout Best Practices: Crafting a Clear, Scannable Structure
A disciplined layout helps viewers scan the banner in seconds. Favor a simple, scannable structure with a clear vertical flow: start with a strong logo area, followed by the main value proposition, and then supporting details. A single-column or clearly defined grid keeps information organized and guides the eye naturally toward the call to action.
Negative space, safe zones, and consistent alignment are essential for a professional result. Establish a safe margin to avoid trimmed content, and include bleed areas so color extends to the edge. Grid-based alignment ensures logos, headlines, and body text stay cohesive, while a prominent, visually distinct call to action directs attendees to the next step—whether it’s scanning a QR code or grabbing a brochure.
Print-Ready Banner Design: From Concept to Production
Design for print starts with a concept that translates cleanly to physical output. Use vector graphics for logos and icons to maintain sharp edges at large banner sizes, and convert text to outlines if required by the printer. Export print-ready files in CMYK with appropriate bleeds, ensuring color fidelity from screen to print and reducing the risk of color shifts.
The practical aspects of print-ready banner design involve file formats, resolution, and asset management. Provide high-resolution raster images (300 dpi at final size), embed or outline fonts, and supply alternative formats (SVG for logos, PNG/TIFF for images) as requested by the printer. Ensuring these details are handled during production minimizes last-minute complications and supports a smooth hand-off to print services.
Testing, Optimization, and Real-World Considerations for Roll-Up Banners
Testing is a critical step to verify readability and impact under real-world conditions. Create multiple variations of the banner design and evaluate them in lighting and viewing distances similar to the event environment. Gather feedback from colleagues or stakeholders to assess legibility, color accuracy, and overall impact before finalizing the print-ready files.
Optimization is an ongoing process that extends from concept to production. Iterate on typography, color balance, and layout based on testing results, and ensure alignment with roll-up banner layout best practices. A well-tested design minimizes miscommunication at the booth, accelerates production, and yields a confident, on-brand presence that resonates with attendees long after the event.
Frequently Asked Questions
How does custom roll-up banner design align with roll-up banner design guidelines to maximize legibility and impact?
In a custom roll-up banner design, follow established roll-up banner design guidelines by using a simple, scannable structure, high text contrast, and a clear typographic hierarchy. Limit font families, maintain strong margins and a safe zone for production, and ensure the final design is print-ready for reliable results.
How can banner color psychology inform color choices in custom roll-up banner design?
Use a primary brand color with a secondary palette and high-contrast pairings for headlines and body text to improve readability from a distance. Consider color meanings (e.g., red for urgency, blue for trust) and test colors under venue lighting to maintain accessibility and legibility.
What typography for banners considerations should guide typography choices in a custom roll-up banner design?
Apply guidance from typography for banners: limit to two complementary typefaces, establish a strong hierarchy, and use large headline sizes (roughly 40–72 pt) for visibility. Ensure clear distinction between headline and body, manage kerning, and keep line lengths concise for faster reading.
What roll-up banner layout best practices should you apply in a custom roll-up banner design?
Adopt a simple vertical flow: logo at the top, then a compelling headline, followed by supporting text and a call to action. Use negative space, align elements to a grid, consider safe zones and bleed, and place imagery thoughtfully to support the message without overpowering text.
What makes a print-ready banner design part of a successful custom roll-up banner design?
For print-ready outcomes, design in CMYK, include 3–5 mm bleeds, keep essential content inside safe zones, convert fonts to outlines or embed them, and export clean print-ready PDFs with vector logos and high-resolution imagery.
What testing steps help ensure your custom roll-up banner design performs well in real-world conditions?
Create multiple design variations and test readability from various distances and under expected lighting. Use soft proofs or on-site checks to verify color accuracy, gather feedback, and iterate before final print to minimize production issues.
| Aspect | Key Points |
|---|---|
| Introduction / Purpose of Roll-Up Banners | Roll-up banners are powerful event touchpoints that grab attention, communicate a concise message, and drive action. They must read well up close and from distance, and be practical for production and placement. |
| Color Strategy | Establish a primary brand color and a secondary palette. Use high-contrast pairings for headlines and body text to maximize legibility from distance. Pair vibrant hues with neutral tones to avoid a noisy look. Test colors under venue lighting and ensure accessibility with sufficient contrast. |
| Typography | Limit to two font families (one for headlines, one for body). Prioritize hierarchy (headline > subhead > body). Use large headlines (roughly 40–72 pt) for readability from several meters away. Ensure clear distinction between headline and body, mind kerning, and keep line lengths readable. |
| Layout | Adopt a simple, scannable structure with a clear top area for logo, a strong headline, and supporting details. Use negative space, account for safe zones and bleed, align to a grid, place a prominent call to action, and select imagery that reinforces without overpowering text. |
| Production Considerations | Design for scalability and print-friendliness. Use vector graphics for logos/icons and convert text to outlines if required. Export print-ready CMYK files with appropriate bleed settings. |
| Print-Ready Tips | Work at 300 dpi at final print size. Design in CMYK; include 3–5 mm bleed. Embed fonts or outlines and provide alternative formats (SVG for logos, PNG/TIFF for images) as needed. Ensure high color contrast for readability. |
| Testing & Optimization | Create variations and test under conditions similar to the event (distance, lighting, and viewing angles). Gather feedback and refine to reduce miscommunication and improve impact. |
| Common Mistakes to Avoid | Cluttered content, overly complex imagery, insufficient contrast, weak typographic hierarchy, and too much information. Banners should be concise and readable at a glance. |
Summary
Custom roll-up banner design is a discipline that blends aesthetics with practical production considerations to create banners that capture attention and drive action. By focusing on color strategy, typography, and layout, you ensure messages stay clear from multiple distances and lighting conditions. When design aligns with print-ready standards and testing, banners become reliable ambassadors for your brand across events, trade shows, and showrooms, delivering impact long after the booth door closes.