
Attach embroidered patches to a variety of fabrics to instantly transform everyday items. From denim jackets to backpacks and hats, a well-placed patch adds personality and meaning. For a polished look, you should know the common methods used to attach embroidered patches, including iron-on patches, sewing patches, and adhesive patches. This guide highlights how to apply embroidered patches with confidence and offers patch attachment tips to help you choose the right method. With careful alignment and finishing, you’ll achieve durable, stylish results that last through wear and washing.
Viewed through an LSI lens, the topic broadens beyond the literal patches to related terms like fabric badges, decorative emblems, and sew-on insignias. Readers might search with variations such as heat-sealed patches, stick-on patches, or sewn-on decor, so using these related terms improves relevance and reach. Language can shift to phrases like patch integration, badge placement, or garment embellishment while still describing the same idea. Employing semantic relationships helps search engines connect your content to a wider set of user queries and topics.
Iron-On Patches: Fast Attachments for Denim and Cotton
Iron-on patches offer a fast route to style, especially on sturdy fabrics like denim and cotton twill. The built-in heat-activated adhesive bonds quickly when properly heated, creating a clean finish without visible stitches. For best results, choose patches labeled for your fabric weight and avoid delicate blends that may not hold as well.
Before applying iron-on patches, prep the surface by washing and drying the garment, testing the patch backing instructions, and selecting a flat, firm workspace. Align the patch carefully, use a pressing cloth, and apply steady, even pressure at the temperature and duration recommended. After bonding, allow the fabric to cool completely to ensure a lasting seal.
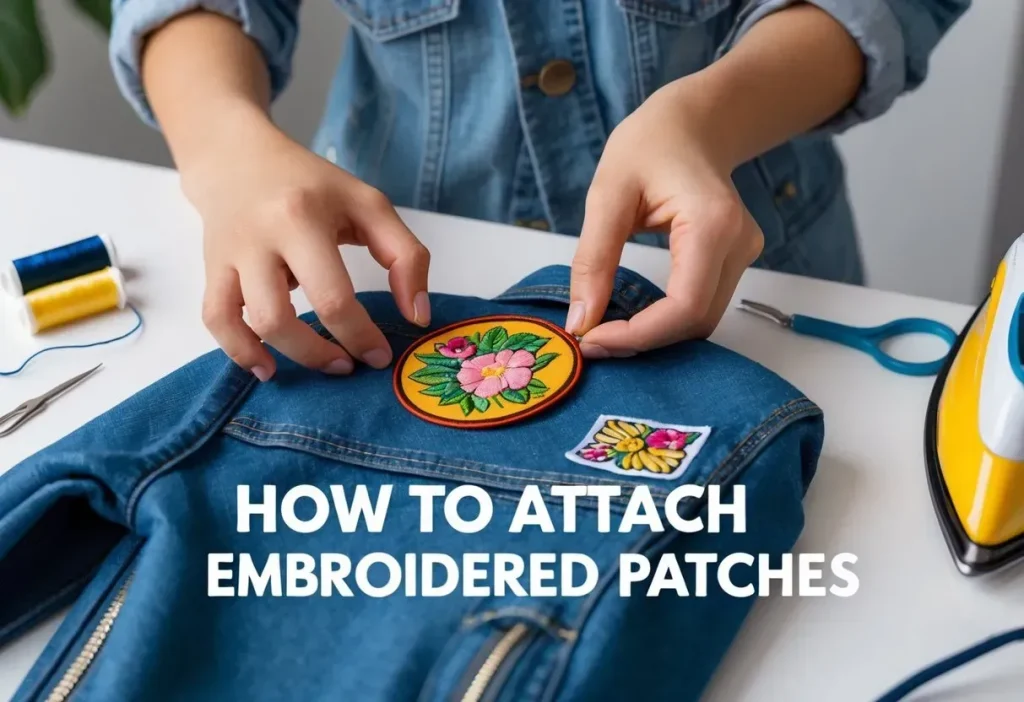
Sewing Patches for Long-Lasting Durability and a Clean Finish
Sewing patches provides a durable bond that can withstand frequent washing and heavy wear. By stitching around the border with a tight running stitch, blanket stitch, or zigzag stitch, you create a mechanical attachment that won’t rely on heat alone. This method works well on jackets, backpacks, and hats where longevity matters.
Whether you hand-sew or use a sewing machine, choose a stitch that hugs the edge of the patch and keeps tension even. For curved edges, sew slowly to follow the contour and trim threads as you go. After attaching, press from the fabric’s underside to flatten seams and let the stitches settle; a light finishing stitch helps durability.
Adhesive Patches: Quick Fixes with Gentle Curing and Care
Adhesive patches offer a middle ground between heat-based methods and sewing, delivering quick results without full stitching. These patches rely on a peel-and-stick backing or a fabric-safe glue that cures over time, sometimes aided by light heat depending on the product. They are particularly convenient for fabrics where heat or sewing is risky.
Careful with fabrics, as some adhesives tolerate only light use or air drying. Follow the product’s curing times and instructions; for extra security, pair adhesive patches with a few stitches along the edge to minimize creep during washing. This approach can balance ease of use with added longevity.
How to Apply Embroidered Patches: A Practical Step-by-Step Guide
To learn how to apply embroidered patches, start with a clean, dry fabric surface. Gather your patch, suitable tools, and decide on the method you’ll use (iron-on, sewing, or adhesive). Proper prep reduces shifting and helps the patch lie flat from edge to edge.
Test a small hidden area when unsure about heat or adhesive performance. For iron-ons, use a pressing cloth and follow the temperature and time guidelines; for adhesives, allow curing time before washing; and for sewing, select a suitable stitch and practice on scrap fabric first. If you’re wondering how to apply embroidered patches, this approach keeps results consistent.
Patch Attachment Tips: How to Attach Embroidered Patches Safely Across Fabrics
Attachment tips include choosing the right method for fabric type, patch size, and expected wear. For denim, canvas, and heavy cotton, iron-on or sewing patches typically perform best, while delicate knits may require gentler testing. Always consider fabric stretch and weave when planning attachment.
Before pressing or stitching, use pins or a temporary baste to hold position and prevent shifting. Check alignment from multiple angles, and consider finishing with a light stitch around the edge to guard against edge lifting during washing. These patch attachment tips help ensure a secure, long-lasting result.
Care and Maintenance After Attachment: Prolonging Patch Life
Regardless of the method used, washing and drying habits influence longevity. Turn garments inside out, use a mild detergent, and avoid high heat that can weaken adhesives or distort stitches. Air-drying or using a low-heat cycle helps patches stay adhered longer.
Regular checks for edge lifting and re-securing loose areas extend life. If you notice wear, re-press, re-sew, or reapply a fresh patch depending on the method used. For mixed-method setups, reassess the patch after seasons to maintain performance and appearance.
Frequently Asked Questions
What are the best ways to attach embroidered patches, and how do iron-on patches, sewing patches, and adhesive patches compare for longevity and ease?
There are three common methods to attach embroidered patches: iron-on patches, sewing patches, and adhesive patches. Iron-on patches offer quick results on sturdy fabrics like denim; sewing patches provide the strongest hold for frequent washing; adhesive patches are a convenient middle option for fabrics where heat isn’t ideal. Quick start: prep your fabric and patch, align them, then follow the instructions for your method—heat and press for iron-ons, stitch around the edge for sewing patches, or press with glue for adhesive patches. For extra security, sew around the edges after bonding or cooling.
What fabrics are best for applying iron-on patches, and how to attach embroidered patches on delicate fabrics?
Use sturdy fabrics such as denim, cotton twill, and some cotton blends. Prep by pre-washing, lay flat, and center the patch. Heat-set: set iron to 180–200°C (350–400°F) without steam; place a pressing cloth over the patch; press firmly for 15–30 seconds, then flip and heat the back for another 15–20 seconds. Let cool completely. If needed, stitch around the edge for added durability, especially on active wear.
What are essential patch attachment tips to prevent edges lifting or peeling after washing when attaching embroidered patches?
Patch attachment tips to prevent lifting: 1) ensure a clean, dry surface; 2) align patch precisely using pins or baste; 3) test heat on a hidden area before full bonding; 4) allow the patch to cool before handling; 5) for iron-on or adhesive patches, consider finishing with a tight stitch around the edge after bonding.
Can I remove and reattach embroidered patches after you attach embroidered patches, and which methods are most reversible?
Yes, but reversibility depends on the method. Sewing patches are easiest to remove by carefully cutting the stitches; iron-on and adhesive patches may lift with more difficulty and can leave residue or require heat or solvent. Always test on a hidden area first, follow product instructions if removing, and then reattach using the method that best suits your fabric and wear.
How should I care for garments after you attach embroidered patches, and what washing guidelines help patch longevity?
Care for garments after attaching embroidered patches: turn the garment inside out, use a mild detergent, and wash in cool or warm water. Avoid high heat on dryers, which can loosen adhesives or damage stitches. For iron-on patches, re-press if needed; for sewing patches, inspect and re-sew edges if you notice lifting. Proper air-drying is often best to protect patch integrity.
Which method is best to attach embroidered patches for frequent-wash items: sewing patches, iron-on patches, or adhesive patches, and when should I choose sewing patches?
For frequent-wash items, sewing patches generally offers the best durability. Use a tight zigzag or blanket stitch around the edge and choose thread color that matches. If heat exposure is a concern, adhesive patches with an extra stitch can help, but sewing patches remain the most robust option for long wear.
| Aspect | Iron-On Patches | Sewing Patches | Adhesive Patches |
|---|---|---|---|
| What it is | Heat-activated patches with an adhesive backing that bond to fabric when heated. | Patches sewn directly to fabric with thread, creating a strong mechanical bond. | Backed with adhesive or glue that sticks to fabric, sometimes heat-activated. |
| What you’ll need | Patch with heat-activated backing; iron or heat press; clean, dry surface; pressing cloth; firm surface. | Patch, matching thread and a sharp needle or sewing machine with zigzag/blanket stitch; scissors; pins or light fabric glue. | Adhesive-backed patch or fabric glue; clean flat surface; optional heat activation tool; follow product instructions. |
| Prep & alignment | Pre-wash garment if possible; lay flat; align; check alignment. | Place patch; pin or baste to hold while sewing. | Align patch; hold with pins or a light dab of glue to prevent shifting, especially on stretchy fabrics. |
| Application steps | Set iron to 180–200°C (350–400°F) without steam. Place a pressing cloth over patch; press 15–30 seconds. Turn garment over; apply 15–20 seconds to back. Let cool; re-bond if needed. Optional edge stitching after cooling. | Hand: stitch around edge with tight, even stitches; or machine: use small stitch length with zigzag or blanket stitch; go slowly on curves; tie off securely. | If heat-activated, follow iron-on steps with gentler heat. If using glue, apply thin, even layer and press; cure as directed; some require heat, others cure at room temperature. For durability, consider finishing with a light stitch along the edge. |
| Durability & care | Typically holds well with proper prep; less durable with frequent washing and hot dryers; may reinforce with stitches. | Durable; withstands machine washing; avoid high-heat dryers on delicate fabrics. | Cure may vary; wash durability can be lower; consider adding stitching for security; follow fabric-care guidelines. |
| Best fabrics | Denim, cotton twill, and some blends. | Most fabrics; heavy wear items; curves preferred with sewing. | Materials compatible with adhesive; test on stretch fabrics; avoid delicate or textured surfaces that resist sticking. |
| When to choose | Fast, clean look; quick project; fabrics that tolerate heat. | Maximum durability and frequent washing; items intended for long wear. | Temporary or heat-sensitive fabrics; convenient and reversible; or combine with stitching for extra security. |
| Common cautions | Avoid heat on delicate fabrics (silk, low heat tolerance); do not iron on leather/vinyl patches; may crack/peel with washing; consider edge stitching for security. | Be mindful of puckering on delicate fabrics; finish edges securely; test on curves; secure threads. | Adhesive may shift; ensure cure time; some adhesives require light heat; follow product instructions; test before washing. |
| Care & longevity | Gently lift corner to check bond; re-press if needed; avoid hot washing/drying; sewing adds durability. | Machine washable; protect edges; avoid high-heat dryers on delicate fabrics. | Allow full cure; wash after cure; consider supplementary stitching for durability; reapply as needed. |